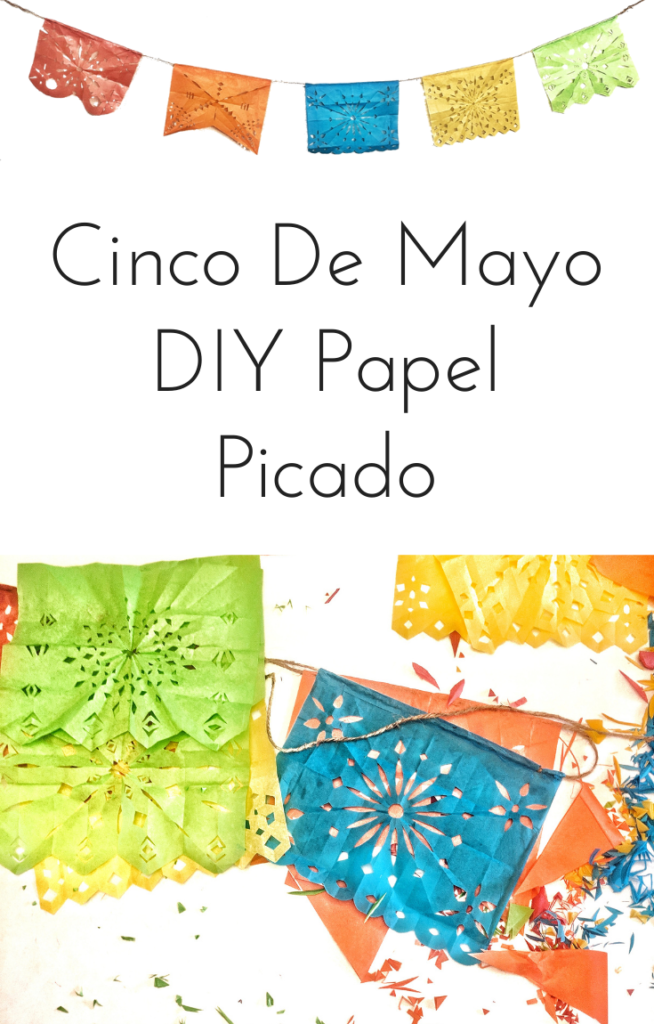
Cinco de Mayo, Dia de los Muertos (Day of the Dead), or any fiesta themed party isn’t complete without a Papel Picado Banner! Get ready to entertain with this easy tuitorial. The signature of any Mexican decor, the Papel Picado Banner is considered Mexican folk art. San Salvador Huixcolta is considered the center of papel picado, where it is primarily produced in celebration of Dia de los Muertos. They use chisels! (Don’t worry, we’ll be using good ole scissors!) It has now been adopted around the world as a staple of Mexican decor.
Making this Papel Picado Banner is just like cutting snowflakes for Christmas, we’ll just be folding the paper differently. After making my exact pattern as shown here, play around with it! I ended up making tons of different designs, I tried to theme them by color but the more variety the better.


Supplies Needed to make DIY Papel Picado Banner:
- Brightly Colored Tissue Paper
- Scissors
- Twine
- Glue (not pictured, I used modgepodge)
Papel Picado Banner Directions:
1. Cut the tissue paper into desired size rectangles (I just folded the large sheets into quarters and cut along the folds to make 4 equal sized rectangles).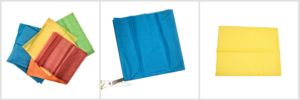
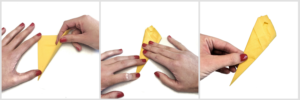
2. Fold the top down about 1/2 inch (this is where the twine will be glued).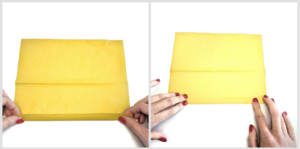
3. Turn the rectangle over (keep the twine fold opening outward) and fold in half (sides together), 4 times.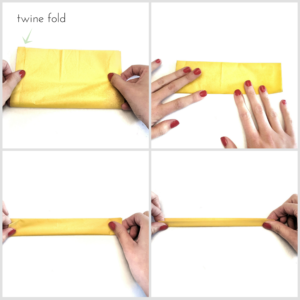
4. Take the raw end (not the twine end) and cut diagonally toward the fold, if you unfold the last one you should have a triangle.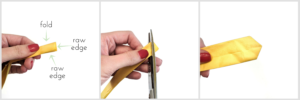
5. Re fold back to the smallest size (if you unfolded and checked your triangle), and cut a triangle pointing into the fold, when you unfold to check, you should have a diamond.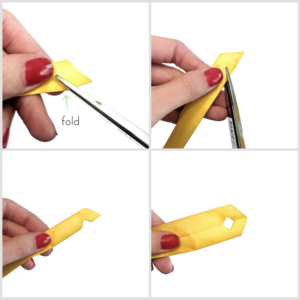
6. Unfold completely, the bottom of your banner is now scalloped! Fold in half, then fold in half again bringing the scalloped edge to the twine fold.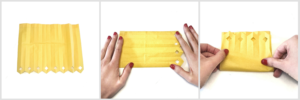
7. Then take the bottom corner of the raw side and fold it to the top corner of the fold side.
9. Cut the tip off
10. Fold in half (if you still have room!) and cut 2 tiny ovals on the fold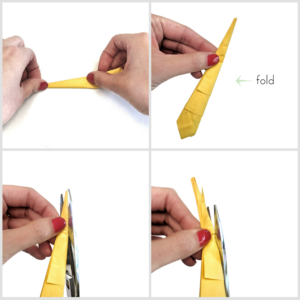
11. On the opposite side (the raw edge), cut 2 triangles (be careful not to cut the twine fold or scalloped edge)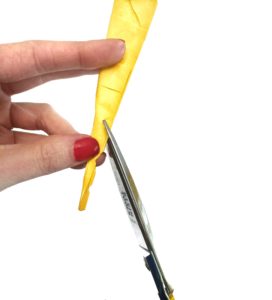
12. Unfold to where you have a square again, and fold the side, raw edge of the banner up to the cut design, then fold that into thirds to make a triangle with the uncut fold creating the tip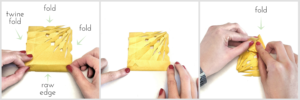
13. Cut the tip off, and cut a triangle into each side 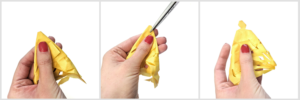
14. Unfold and you’re done!
Have fun and be creative, there are so many different designs you can make! After you have all your rectangles cut and ready, open up the twine fold, spread glue on the inside, place the twine in, and gently press down. Take care to be gentle as the tissue paper tears so easily when wet! Not sure how I missed pictures of gluing rectangles to the twine, sorry!